Trainable image segmentation using Dash, scikit-image and scikit-learn
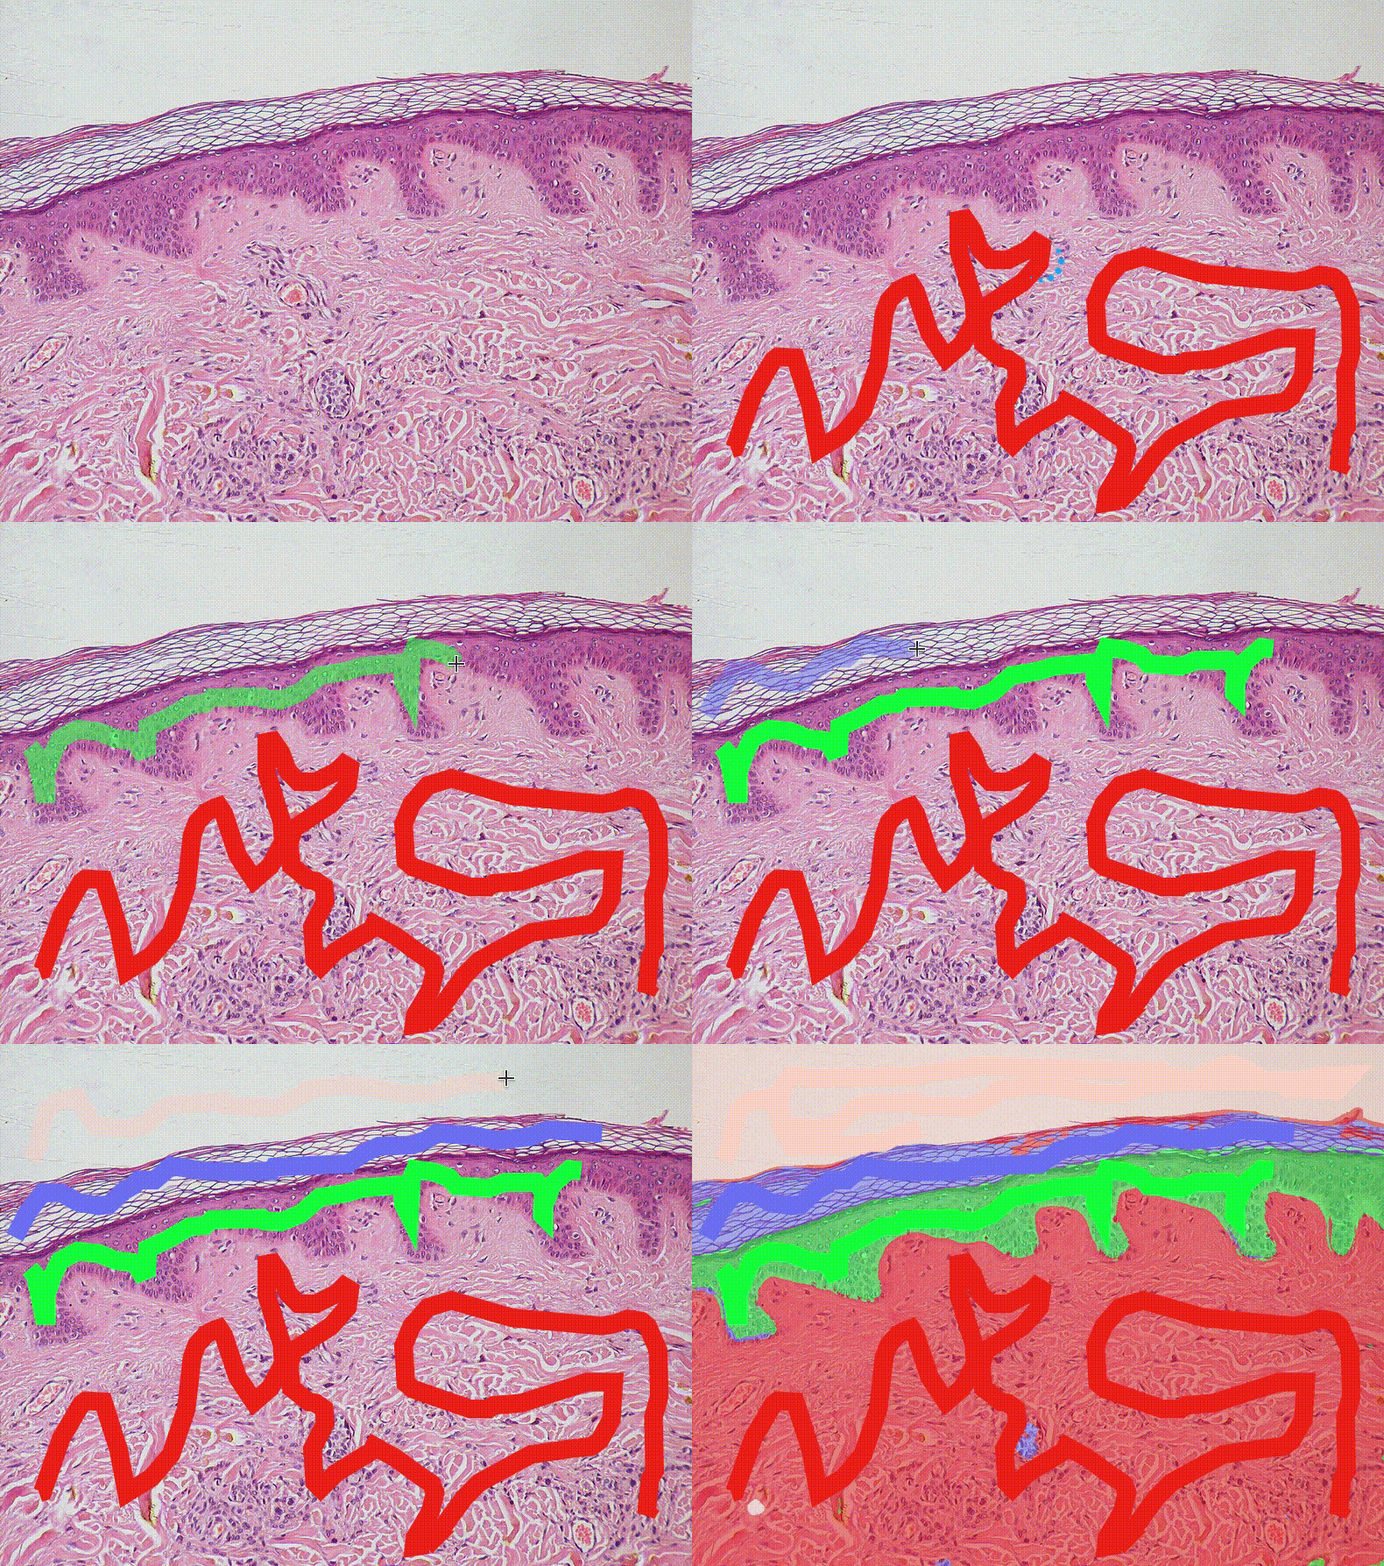
TL; DR: checkout our new image processing app performing interactive image segmentation! Its source code can be found on Github.

Image segmentation is the process of partitioning an image into multiple objects. It is a classical image processing task in various fields of science and technology. There are many possible strategies for image segmentation, as exemplified by the scikit-image gallery of examples on segmentation. However, a large class of segmentation methods relies on machine learning and deep learning, where an algorithm uses a training set of already labeled pixels to determine the class of unlabeled pixels. In this setting the image segmentation task boils down to a classification task.
We have built a simple Dash app to train a machine learning model based on user-annotated regions, and to classify the remaining pixels. This is the same principle used by well-established image segmentation software such as
- The trainable Weka segmentation Fiji plugin
- ilastik, an interactive learning and segmentation desktop application.
With the different libraries of the scientific Python ecosystem, such as scikit-image and scikit-learn, and Dash to build an interactive app in pure Python, it is possible to build a highly-customizable app which you can integrate into your specific workflow. And all in Python!
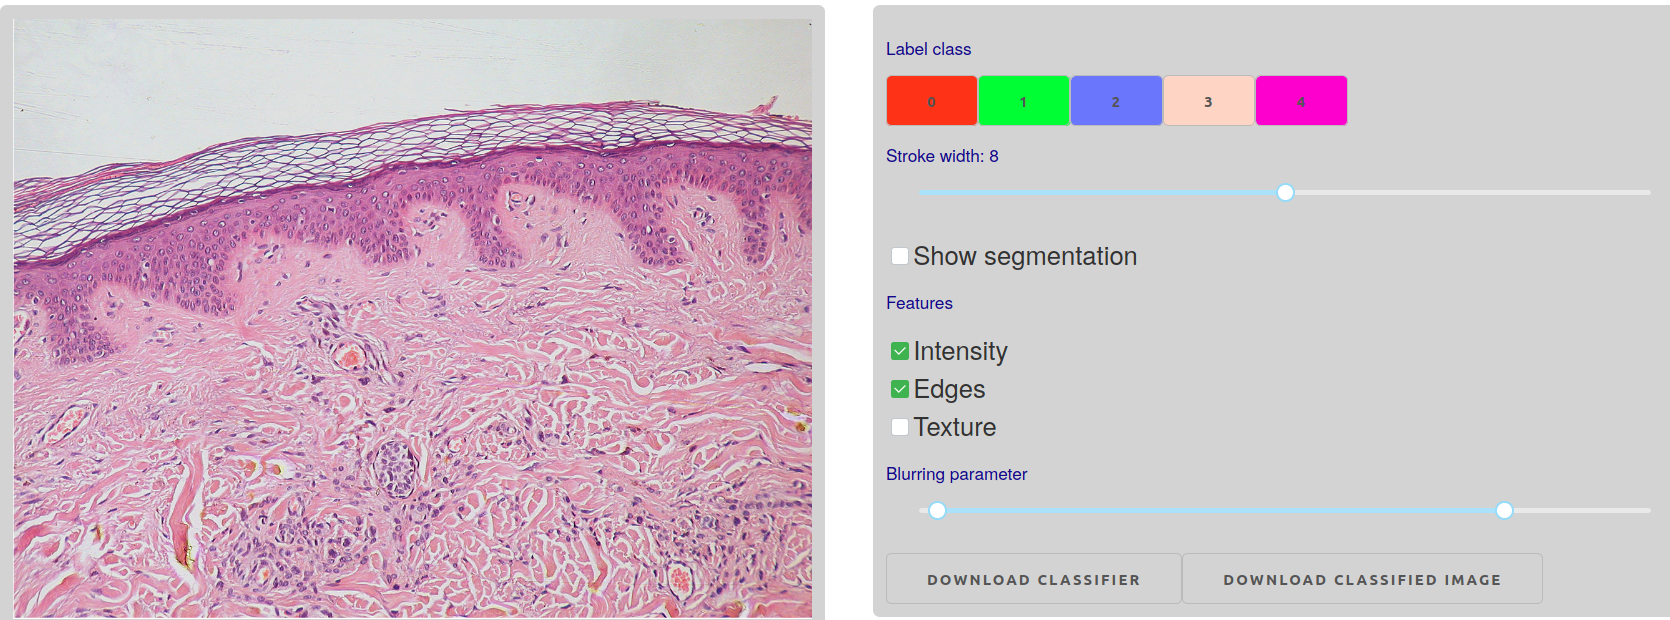
Image annotation and feature selection
In machine learning, a sample is represented as a vector of features. Deep learning models learn features directly from the data and are very popular for image processing. Nevertheless, they require a large training set and their training is very resource-intensive. We instead use local features which, for each pixel, represent
- the average intensity in a small region around the pixel
- the average magnitude of gradients in the same region
- measures of local texture in this region
Such features are computed by first convolving the image of interest with a Gaussian
kernel, and then measuring the local color intensity, gradient intensity, or the
eigenvalues of the Hessian matrix. Conveniently, these operations are provided
by the filters module of scikit-image and are relatively fast, since they
operate on local neighbourhoods.
import numpy as np
from skimage import filters

def _singlescale_basic_features(img, sigma, intensity=True, edges=True,
                                texture=True):
    """Features for a single value of the Gaussian blurring parameter ``sigma``
    """
    features = []
    img_blur = filters.gaussian(img, sigma)
    if intensity:
        features.append(img_blur)
    if edges:
        features.append(filters.sobel(img_blur))
    if texture:
        H_elems = [
            np.gradient(np.gradient(img_blur)[ax0], axis=ax1)
            for ax0, ax1 in combinations_with_replacement(range(img.ndim), 2)
        ]
        eigvals = feature.hessian_matrix_eigvals(H_elems)
        for eigval_mat in eigvals:
            features.append(eigval_mat)
    return features
These local features can be computed for each color channel of the image and
for different scales sigma. Large sigmas are useful to capture variations
characteristic of textures but they will make it harder to classify pixels
lying close to the boundary between objects. Users can modify the set of
features in a control panel thanks to interactive elements from
dash-core-components:
a checklist for the type of features and a range
slider for the sigma parameter.

To build the training set, we use the new shape drawing capabilities
of plotly.py
and in particular the drawopenpath dragmode which can used to draw
“squiggles” on parts of the image which you want to label. The width of the squiggle can be adjusted with a Dash
dcc.Slider to make it possible to annotate features of different sizes. Each time a new annotation is drawn, it is [captured by the plotly figure’s
relayoutData event, which triggers a callback]](https://dash.plotly.com/interactive-graphing).
Model training and prediction
Features are extracted for the annotated pixels, and passed to a scikit-learn Random Forest Classifier. This estimator belongs to the class of ensemble methods, where the predictions by several base estimators are combined to improve the generalizability or robustness of the prediction. After the model is trained, its prediction is computed on unlabeled pixels, resulting in a segmentation of the image. It is possible to add more annotations to improve the segmentation if some pixels are wrongly classified. Furthermore, one can download the estimator in order to classify new images of the same type (for example, a time series).
What’s next?
We hope you like this app. Suggestions are welcome, and can be submitted via the source repo or on Twitter.
There is an open pull request in scikit-image to integrate the code into scikit-image in order to extract features, train the classifier and predict the class of unlabeled pixels. If the PR is accepted, the image processing code will consist only of calling two scikit-image functions, whose parameters correspond directly to the elements of the user interface in the Dash application.
For more image-related interactive applications, checkout the Dash gallery!